
You’ve spent countless hours designing and updating your website. But you’re not getting paid for all of your hard work.
Rather than letting your efforts go to waste, you can monetize your website by adding Google AdSense.
What is Google AdSense?
In short, AdSense is an advertising network run by Google. It’s a free way for websites to make money by displaying targeted Google advertisements on their sites.
Advertisements come in all shapes and sizes. Your site can display images, videos, text, and interactive ads as a monetization strategy.
Arguably the best part about Google AdSense (aside from the cost — it’s free) is that you won’t have to deal with advertisers directly. Everything gets handled through Google’s platform, so you don’t have to worry about collecting money or maintaining relationships when you’re hosting ads.
Google does all of that work for you. It collects money from the advertisers, keeps 32% for its role in facilitating the process, and the remaining 68% goes to the publisher (you).
It’s essentially a hassle-free way to earn money by displaying ads on your website.
How AdSense works
AdSense is based on a bidding system, which is referred to as an “ad auction.”
Advertisers determine how much they are willing to pay for their ads to be displayed by setting a maximum bid price. Google automatically connects advertisers with publishers who have relevant users for the advertisements.
For example, if you run a blog for new mothers about getting through that first pregnancy, your website visitors won’t see ads related to skateboarding targeted at teenage boys.
If more advertisers bid to be displayed on your site, bids will increase as well in order to stay competitive. In this case, you’ll be able to earn more money as a publisher.
Google uses a tool called Ad Rank to determine which ads will appear on your website. This is the basic formula used by Ad Rank.
![]()
Quality score is extremely important, which is why it equally weighted with the bid. Quality score is measured by predicted click-through rates based on past performance as well as other relevant factors, such as keywords.
This means that an ad with a lower bid could win an auction if they have a high quality score, even if other advertisers had a higher bid.
That’s because Google wants to make sure that the ads get clicked, which is a win-win-win scenario for your website, the advertiser, and Google.
Getting paid with AdSense (bid types)
Website owners get paid based on various bid types for the ads they display.
- CPC (cost per click)
- CPM (cost per thousand impressions)
- Active View CPM (active view cost per thousand impressions)
- CPE (cost per engagement)
CPC
With the CPC monetization strategy, you’ll get paid for each time a website visitor clicks on an ad displayed on your website. Depending on the content of the ad, some advertisers are willing to pay higher rates for clicks than others.
CPM
In the advertising world, the “M” in CPM stands for mille, which is Latin for thousand. So, Cost Per Thousand — or the cost per 1,000 impressions. In this case, publishers are paid for displaying the ad, regardless if a user clicks on it or not.
CPM bids are typically lower than CPC bids since the fee structure is not contingent on the user taking an action. Google will display whichever ad type (CPM or CPC) is expected to earn more revenue for the publisher, which is in Google’s best interest, since they take a 32% share of the revenue.
Active View CPM
In order to get paid for Active View CPM ads, the impressions must be measured as “viewable.” This means that at least 50% of an ad needs to be shown on the screen for at least one second.
These bids will be higher than traditional CPM bids since the chances of a website visitor actually seeing the ad are increased.
CPE
Cost per engagement is based on how active a user is with an advertisement. For example, let’s say an advertiser decides to run a lightbox ad. These formats are expandable — they take up a large portion of the screen if they’re clicked on. If a website visitor hovers over a lightbox ad for more than two seconds, the ad will expand. This is the type of engagement that is required for CPE payouts.
How to add Google AdSense to your website in 7 easy steps
Now that you understand the basics of AdSense and how it works, it’s time to get it set up on your website. Believe it or not, this actually isn’t very complicated. You can put AdSense on your website in just four steps.
Step 1: Set up your site
Before you get started, you need to have an existing website. You can’t apply for AdSense on a hypothetical or future site. So for those of you who are in the process of creating a new website or have an “under construction” landing page, you need to hold off before applying.
If you’re at this stage, I have a few guides that can help you out:
- How to Start a Blog That Makes Money in 12 Easy Steps — The Complete Beginner’s Guide
- How to Create a Website in 120 Minutes — Step-by-Step
- 7 Reasons Why You Do NOT Need to Hire a Website Designer
- The Best WordPress Themes For Blogs – 2019 Review
- Brand New Blog. No Traffic. Here’s What to Do.
- How to Make Yourself Write a Blog Post Every Day
Step 2: Make sure your site is in compliance
Google does not just accept any website into this program. You need to meet their eligibility requirements to be considered.
This means that you must have an easy to use navigation. Elements need to be lined up properly. Text must be easy to read. All of the functionality of your site has to work properly.
AdSense won’t work with any publishers that sell counterfeit goods on their website. Any publishers in the AdSense program aren’t allowed to receive traffic from certain sources, such as paid-to-click programs or unsolicited emails.
Google has a responsibility to its advertisers. Businesses don’t want their ads associated with certain types of websites, so it’s Google’s responsibility to review your website content before you get accepted. These are some examples of content that cannot be included on pages with Google ads:
- Mature or adult content
- Shocking content
- Excessive profanity
- Malware or adware
- Drugs or drug paraphernalia
- Sales of alcohol, tobacco, prescription drugs, weapons, or ammunition
- Illegal activity
- Hateful content or discrimination against religion, race, nationality, sexual orientation, gender, etc.
For the full list refer to Google’s eligibility requirements for AdSense. You need to make sure your site complies with all of the guidelines before you apply, or your application will just be rejected.
Step 3: Apply to AdSense
Now that your website is up and running, you’re ready to apply to AdSense.
The first thing you need to do is navigate to the Google AdSense website.
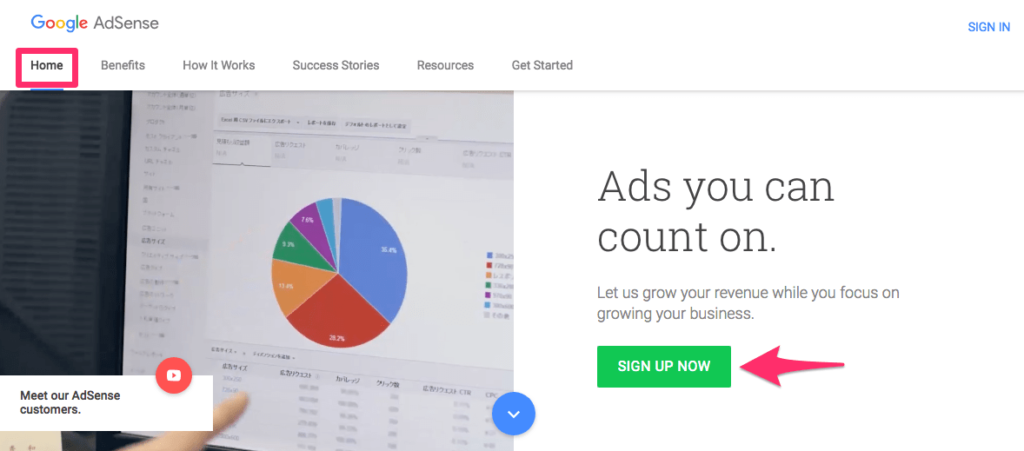
From the Home tab, look for the Sign Up Now button, and click it to start the application process.
Step 4: Configure your ads
Now you have to determine which types of advertisements you want to be displayed on your website.
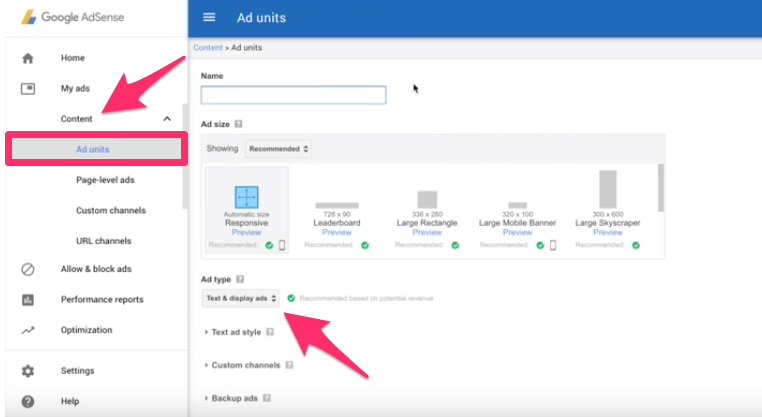
On the left side of your dashboard, look for the Content option. Once you click on Content, there will be a drop-down menu with some additional options. From here, you’ll want to click on the Ad Units menu.
This is where you’ll select things like the ad type, ad size, style, and everything else associated with the advertising space that advertisers will be bidding for.
When choosing a size, it’s in your best interest to go with one of the options recommended by Google. While there are a wide variety of choices, Google gives you recommendations based on the most popular sizes for advertisers.
For ad style options, you can control how text ads are displayed on your site. The best way to do this is to match the style with your website’s color scheme.
Step 5: Copy and paste the AdSense code onto your site
After you’re done configuring your ads, scroll to the bottom of the page.
Click on the “save and get code” button.
Google will automatically generate a code for you to add to your website, which will look something like this.
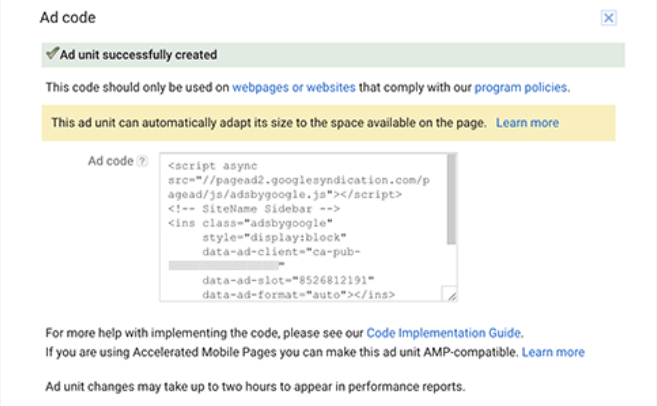
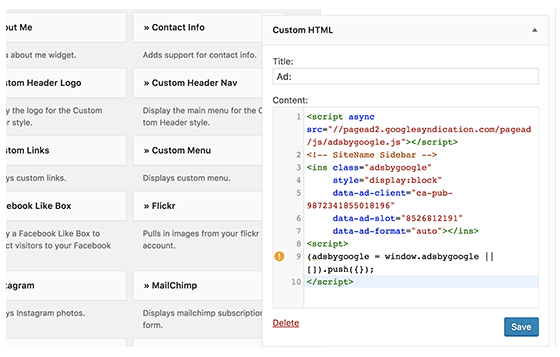
Next, you’re going to copy and paste this code to your website. If you’re using WordPress, you can do this by using widgets.
From the administrative dashboard, go to Appearance and find Widgets.
Paste the custom AdSense URL, then you and just drag and drop the code into the widget area where you want it displayed on your website.
Alternatively, you can use plugins to help you manage your ads. I’d recommend the AdSanity plugin for this.
Step 6: Update your privacy policy
When AdSense is enabled, you need to include a privacy policy on your website. This is in place to let your website visitors know that an ad network is displaying ads on your site.
Here’s the full Google resource for required content in your privacy policy.
Step 7: Verify your address
Once you start generating earnings from Google AdSense, you’ll receive a card from Google in the mail. Before you can withdraw your earnings, you’ll need to make sure your address has been verified.
The card will include a PIN associated with your AdSense account. Just follow the instructions on your card for verifying the PIN online.
Once the PIN and address have been verified, you’ll be able to cash out payments when your account reaches the specified payment threshold.
Google AdSense best practices
Now that you’ve got AdSense installed on your website, you’ll want to make sure that you’re getting the most out of being a publisher. There are certain do’s and don’ts you need to be aware of.
Following these best practices will help you earn more money and reduce your chances of violating Google’s policies.
Never click on your own ads
Since AdSense is based on clicks and other engagement, clicking an advertisement on your own website is considered fraudulent. It’s important that you don’t let any family members in your household click on those ads either.
Google won’t be able to tell the difference between you or your spouse if you’re living together. If they see clicks coming from your house to ads on your website, they can remove you from the AdSense program.
Don’t display ads on your ecommerce site
This isn’t a violation of Google’s policy, but it’s not in the best interest for driving conversions on your website. Remember, AdSense is based on relevancy. So it’s possible (and likely) that one of your competitors’ ads could appear on your website.
If this happens, you could be driving visitors away from your website to a competitor’s site instead. The amount you’ll get paid for displaying the ad isn’t worth the lost sale. Furthermore, ads can distract users from your CTAs and sales copy, even if they aren’t associated with your competition.
So, I wouldn’t recommend AdSense to any websites selling products or services.
Run different ad units
Everyone has different preferences. Different website visitors might be attracted to different styles and types of ads displayed on your website.
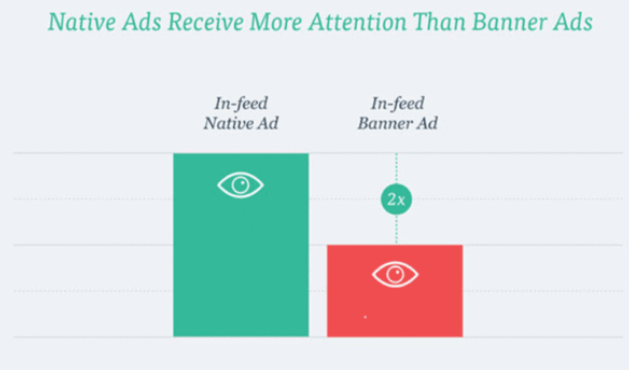
If you’re just running the same ad unit over and over again, you could be leaving some money on the table. For example, let’s say you’re only running text and display ad units right now. You can probably earn more as a publisher by running native ads.
But you won’t know this for certain until you experiment with different ad units.
Find the best placement
In addition to experimenting with ad units, you’ll also want to test different areas of your website for displaying ads. You can’t assume that the first place you put your ad is the best.
I’d recommend checking out Google’s best practices for ad placements based on the type of website you have. They have different suggestions for:
- Blogs
- Gaming sites
- News sites
- Travel sites
- Sports sites
- Classifieds
- Forums
It’s also a good idea to look at some of the most popular and successful websites in your industry. Look at their ad placements. If you notice a common formula across the board, you can try to replicate that as well.
Create content and drive traffic
AdSense isn’t a magic ticket to making money on your website. It’s 100% reliant on your website traffic. So you need to be constantly creating new content and coming up with ways to get more people to your website.
If you’re in a rut with creating content, you might want to read these guides:
- 7 Tools for Generating Infinite Content Ideas for Your Blog
- 10 Lessons Seth Godin Can Teach You About Blogging
- 35 Blogging Ideas That Are Guaranteed to Be Popular Topics
The more traffic you have, the greater chances you’ll have of getting ads seen, clicked, and engaged with.
You can’t just put yourself on autopilot once you add AdSense to your website. It’s imperative that you continue doing all the good things that brought people to your website in the first place. This will be the best way for you to earn money.
In sum: It’s easy to add AdSense to your website
There you have it. You can add Google AdSense to your website in just seven steps.
I’d recommend AdSense for any website that isn’t already selling a product or service. There are tons of other ad networks out there, but Google is definitely the most reputable. AdSense is free for publishers, so there is no harm in trying it out.
Be sure to use this guide as a reference when you’re ready to set up AdSense. Follow my seven-step guide and your site will soon be earning money with ads.