
Want to get going right away? Sign up for SimpleTexting and start texting from your laptop today.
Texting and cell phones usually go together like peanut butter and jelly. But if you want to leverage the power of text messaging to market your products or services, reach prospects quickly, or alert your workforce to time-sensitive information, it’s actually really hard to do from your phone. That’s why business text messaging services exist.
With these services, you can easily use your laptop to send a text message to a single recipient or a group text to larger audiences. This type of quick and efficient outreach can play a big part in your company’s success. Read on to learn how to quickly and effectively text from a laptop.

Quick Start Guide to Texting from a Laptop
Whether you want to send bulk texts to your entire customer database or an individual message to a high-value contact, SimpleTexting is software that makes it easy to do both. Sending a text to a single contact takes just two steps.
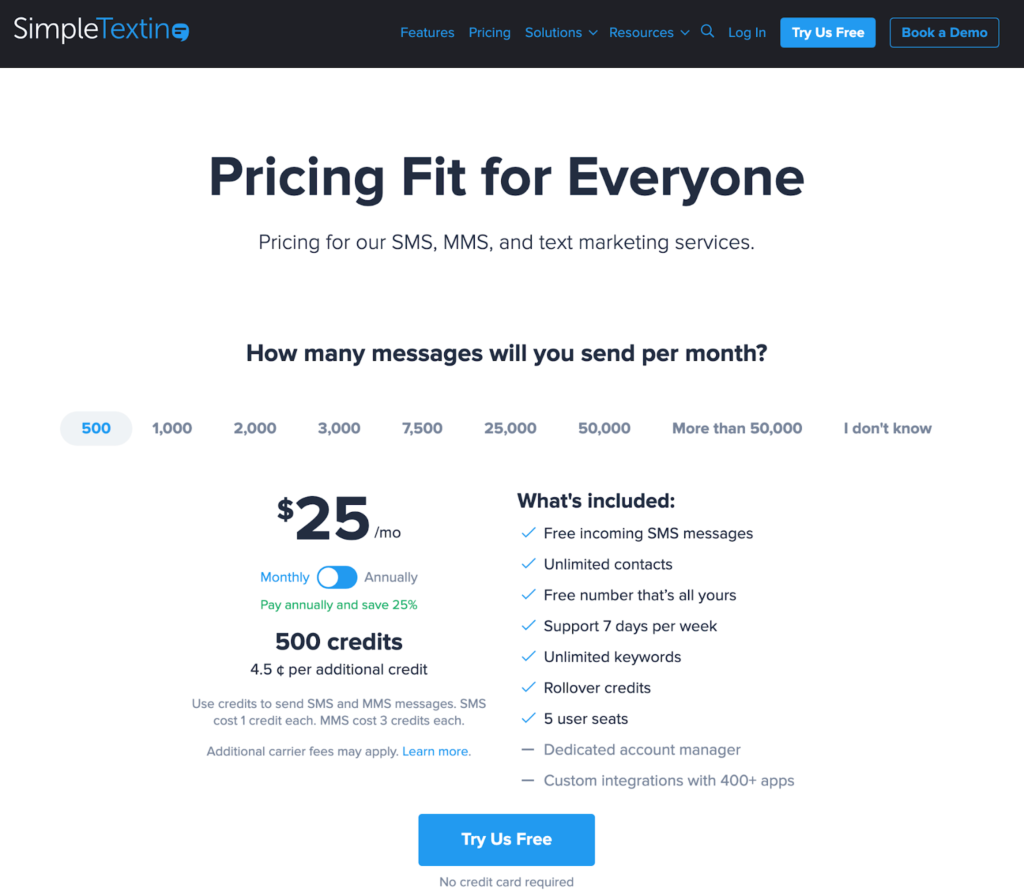
First, sign up for a SimpleTexting account. There are a variety of plans available there, with pricing determined by how many texts you plan to send each month.
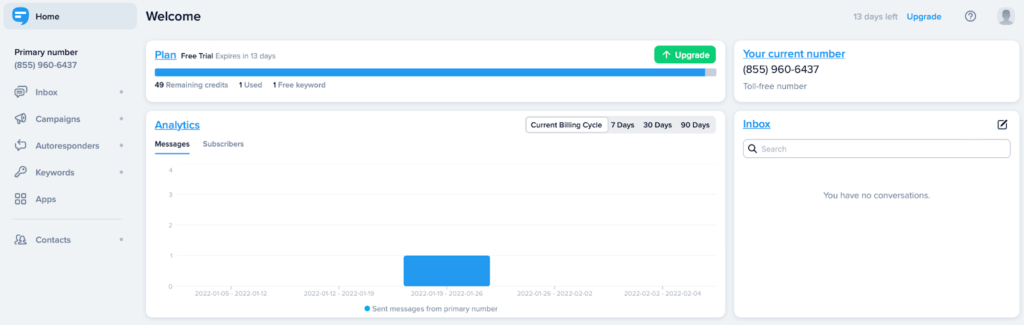
There’s also a 14-day free trial, so you can test the waters with no obligation. You don’t even need to provide a credit card. Once you create your account, you’ll be assigned a toll-free number and taken to a home screen like this:
Next, send an individual text. Now that you have your account, sending a text couldn’t be easier. Just select Inbox from the menu on the left, then click New and type in the telephone number of your recipient. If you already have created a contact for this person in SimpleTexting, their information will auto-fill. After that, you can type your message in the box at the bottom of the screen and select Send SMS. That’s it! Your message is on its way.
It’s equally as easy to use SimpleTexting to send group texts to all of your contacts or to specific subsets that you can define.
Send A Group Text From A Laptop In 5 Steps
With a business text messaging service, it’s never been easier to reach your customers or employees with just a few clicks. Here’s how:
- Sign Up With A Business Text Messaging Service
- Create A Contact List
- Add Records To Your Contact List
- Start A Text Campaign
- Send Your Campaign
I’ve selected SimpleTexting for this how-to guide because it’s one of the best all-around services on the market today. Depending on the business text messaging service you choose, the instructions that follow may be different.
1. Sign Up With A Business Text Messaging Service
First, create an account with SimpleTexting. You can begin with their 14-day free trial, and you won’t even have to provide any credit card information to get started.
To activate your free trial account, you will need to provide some basic contact information and answer a few questions about how you plan to use SimpleTexting. With no credit card requirement, this is a truly no-commitment way to try out a business text messaging service.
2. Create A Contact List
Before you can send group texts, you’ll need to create a list of contacts. When you activated your free trial account, SimpleTexting automatically created a list called, appropriately, My First List. Feel free to add records to that list or create a new list with a more informative name.
For this tutorial, I’m going to create a brand new list. Here’s how to do it.
Select Contacts from the menu on the left of the home screen, then click the + New list button.
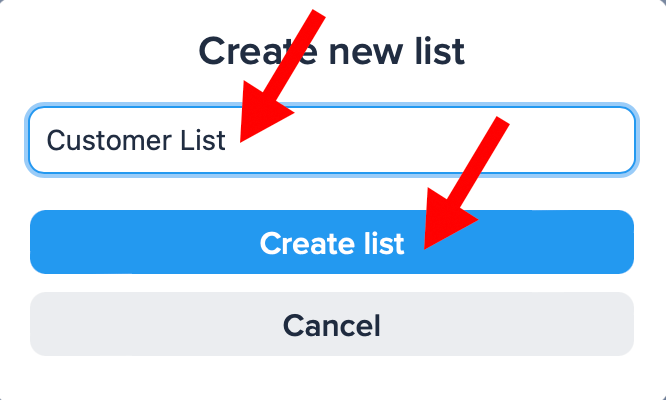
Choose a name for the new list. Here, I chose Customer List, since I eventually plan to send a group text to current customers alerting them to an upcoming sale. Then click Create list.
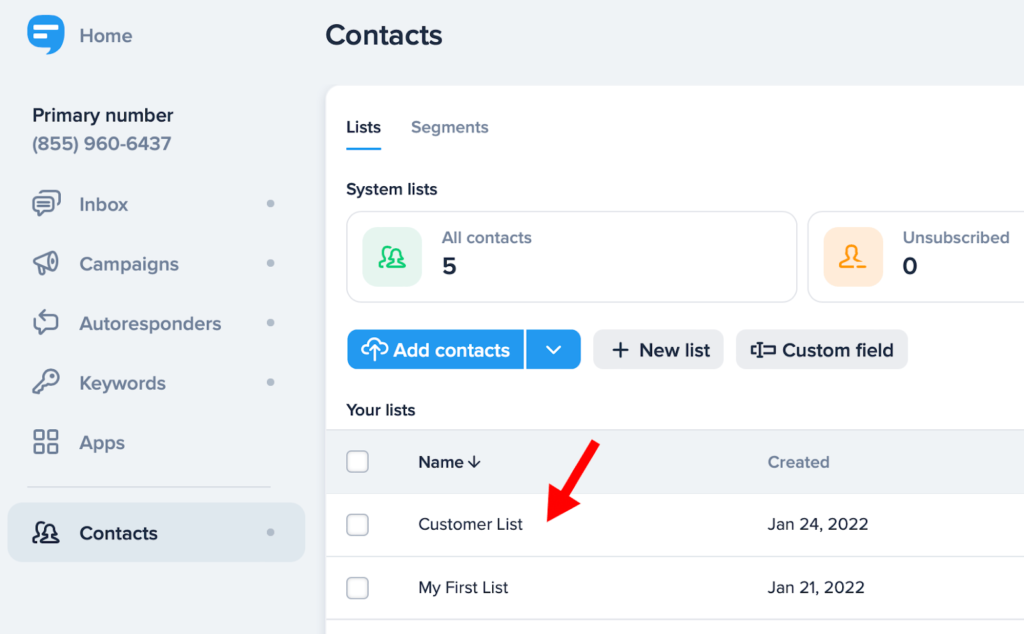
You will then see the newly created list on the Contact screen, as shown below.
Of course, at this stage, your new list is empty. You’ll need to populate it in order to send a group text. The next step shows you how to get that done.
3. Add Records To Your Contact List
If you sign up for a monthly SimpleTexting subscription that includes 7,500 texts per month or higher, you unlock SimpleTexting integrations. This allows you to easily import your contact list data directly from your CRM or another source. You’ll actually get access to more than 400 apps, including some of the most popular CRM tools, including Salesforce, HubSpot, Infusionsoft, and Zoho CRM.
However, if you opt for a lower service tier or are testing out the free trial version of SimpleTexting, you still have several options to populate your contact list. You can import a limited number of CSV, XLS, or XLSX records, connect to a MailChimp list, create Zapier automated workflows that require coding, or manually enter data.
To keep things simple here, I’ll walk you through the process of manually creating records in your list.
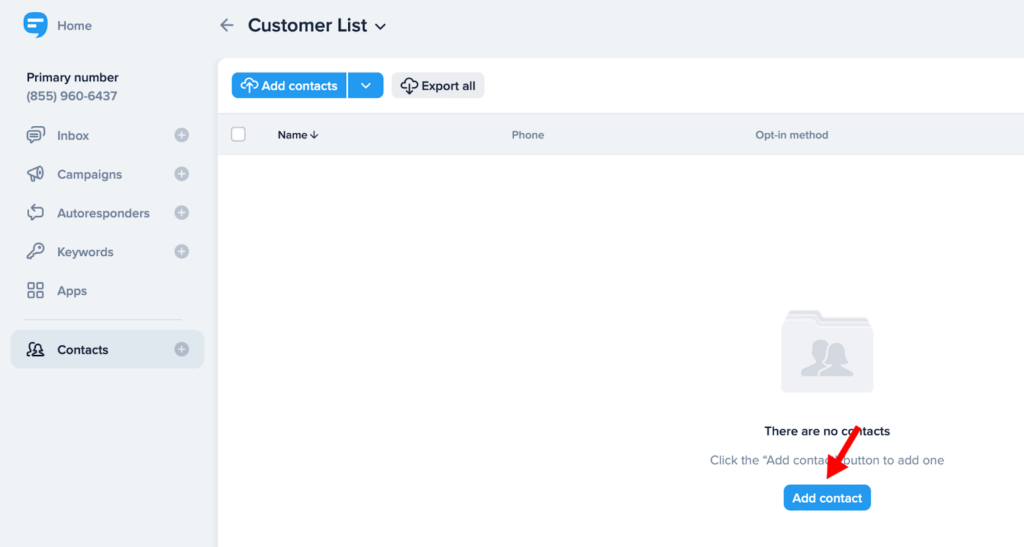
In the Contacts screen, click on your customer list to open it in a new screen. Select Add contact to create your first record in the empty list.
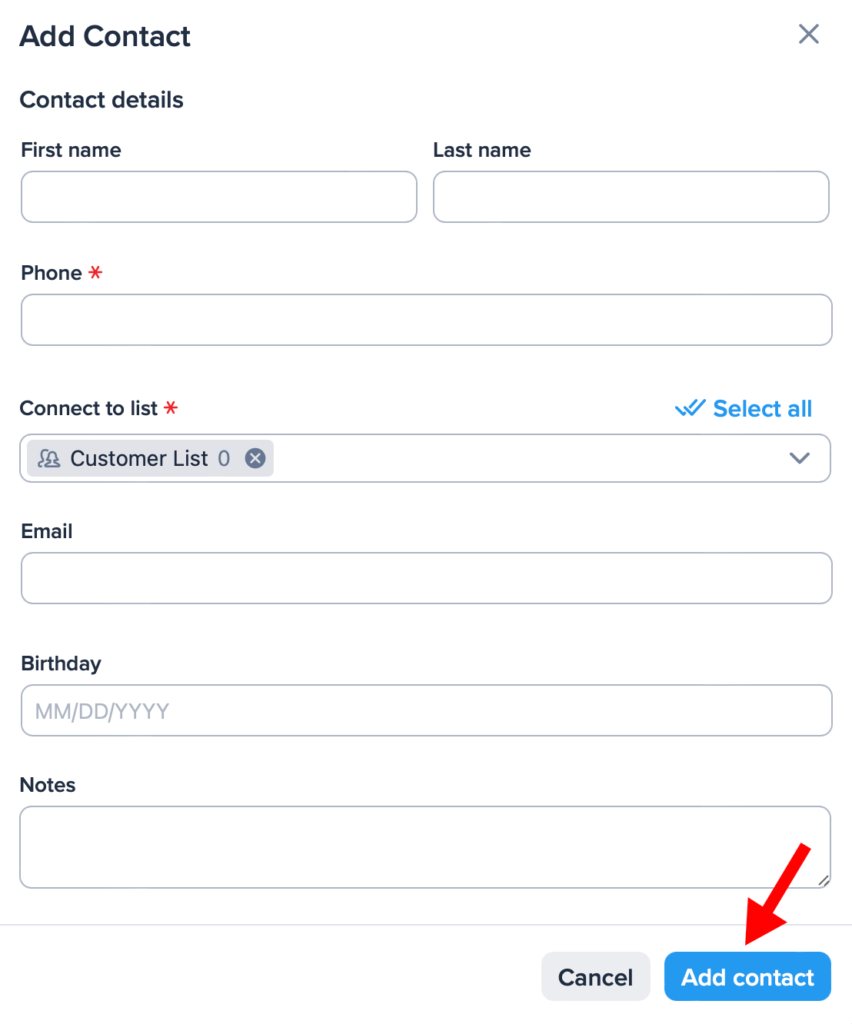
You will then see a pop-up screen, like the one below. Fill in the desired information, then select Add contact to save the record. Note that only a phone number and list name are required, but that you can personalize the contact more than that. I’d suggest making sure to include the contact’s first and last name at least, and their email address would likely be helpful as well.
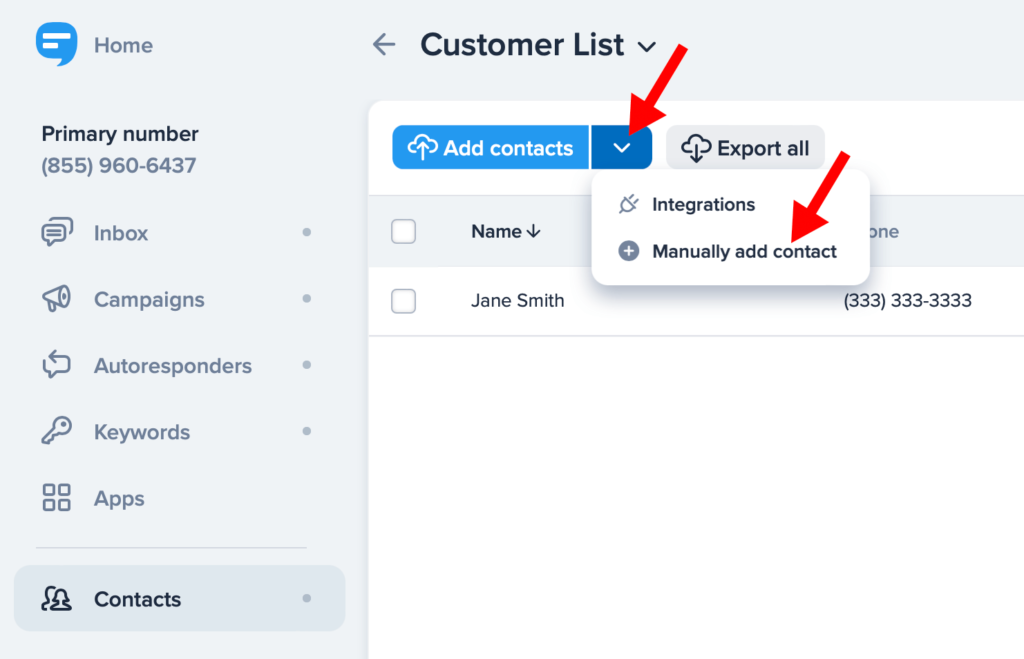
To add additional contacts in the list window, click the Add Contacts drop-down arrow, then select Manually add contact.
This will bring up another pop-up box for the new contact. Repeat these steps to add all your contacts.
And that’s it. You’ve created your first list of future text recipients.
4. Start A Text Campaign
Once you have your contact list populated, you are just a few steps away from sending out a group text. Here’s how to start the process.
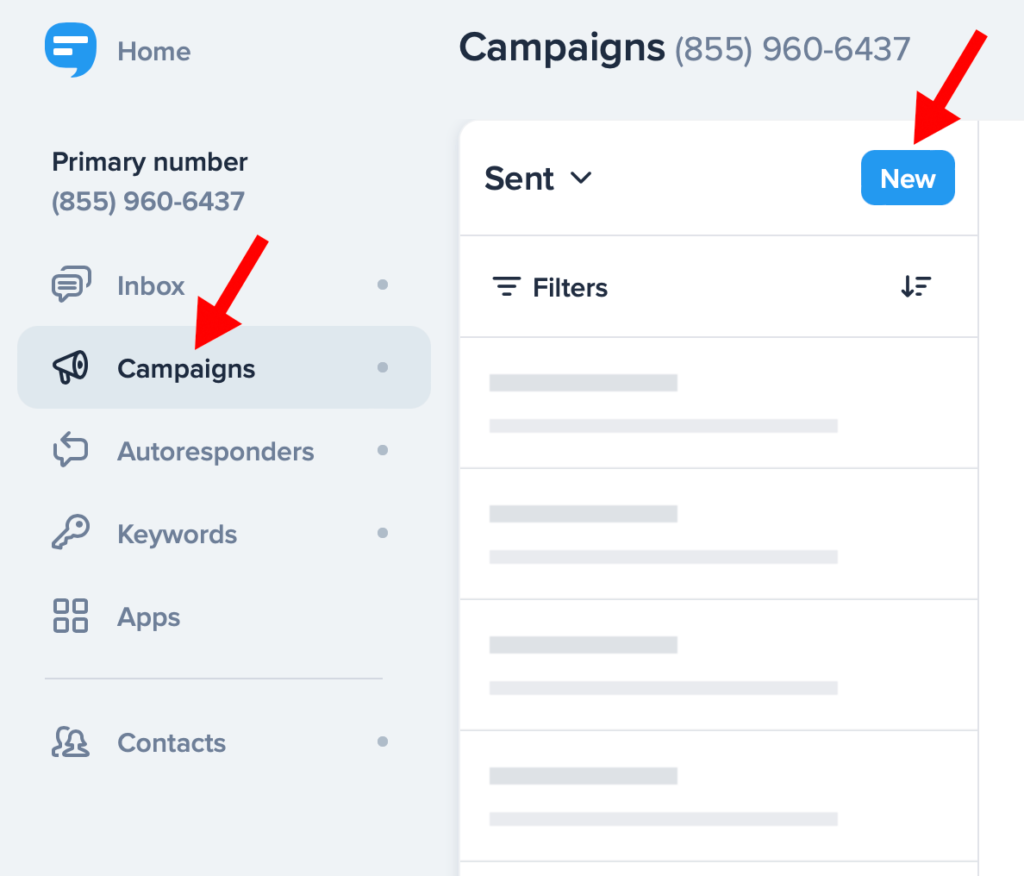
From the SimpleTexting home screen, select Campaigns from the menu on the left, then choose New.
You will see the following Compose campaign screen. Enter your Campaign name and choose whether your message will be formatted as SMS (text only) or MMS (media plus text).
Next, create your message. You can include emojis, custom URLs, media, and even custom fields to personalize your message. As you create your message, you can see how your message will look in the Message preview screen on the right.
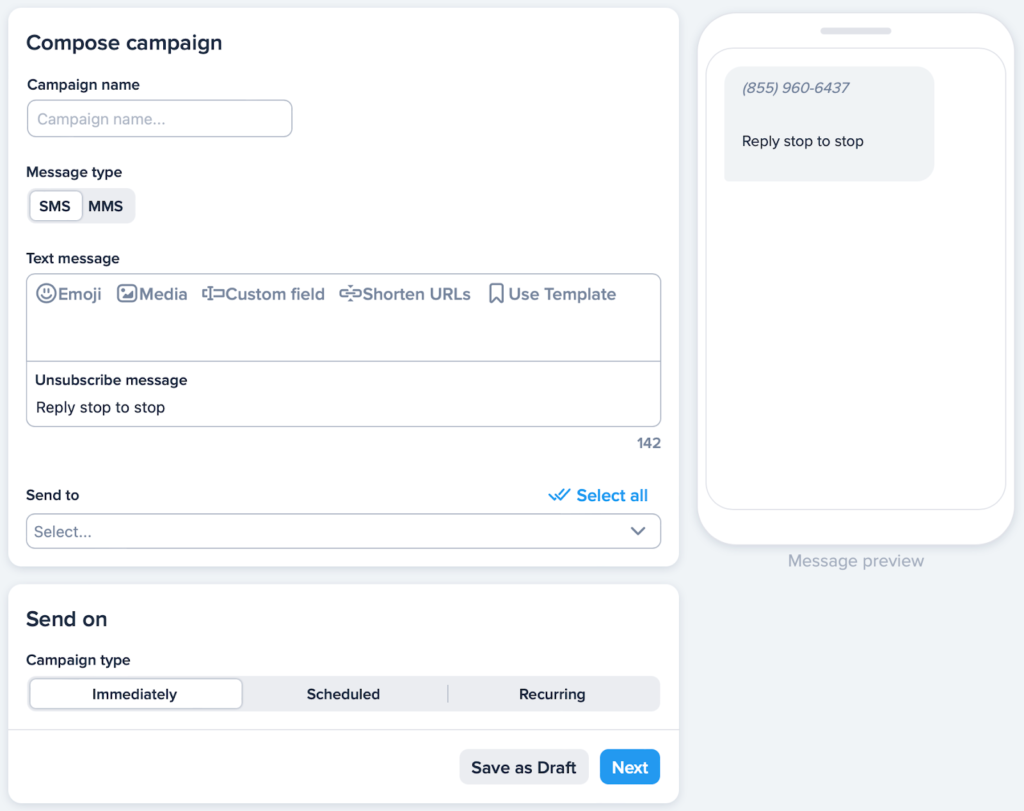
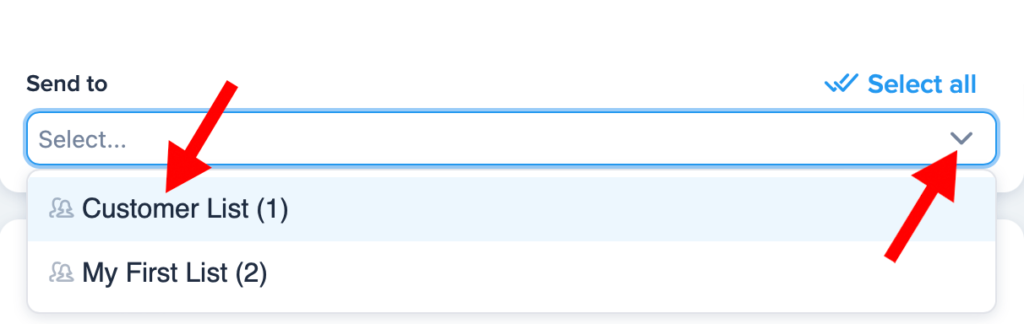
In the Send to field, use the drop-down arrow to display all the lists you’ve created. Select the list you wish to use. Here we’ve chosen the Customer List we created in Steps 2-3.
You’re now almost ready to send your message to the recipients on your chosen list. Don’t close this screen, though. You’ll need to complete a few more steps to finish the process.
5. Send Your Campaign
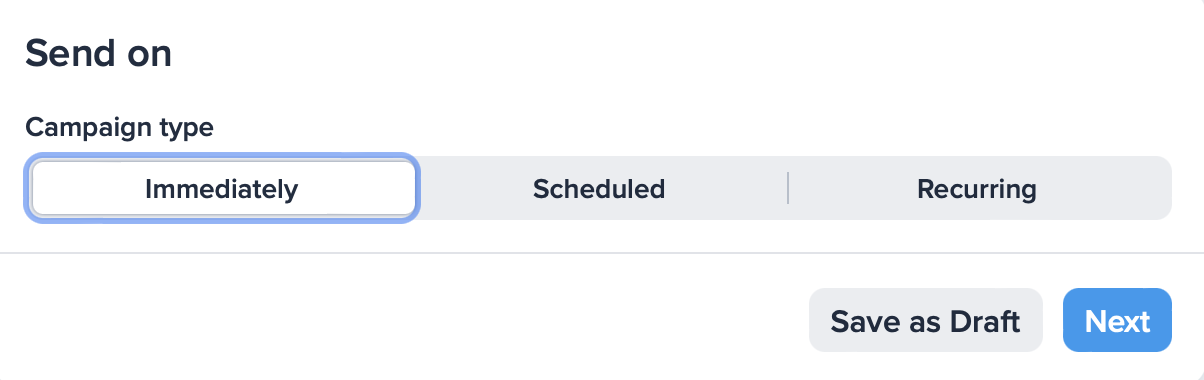
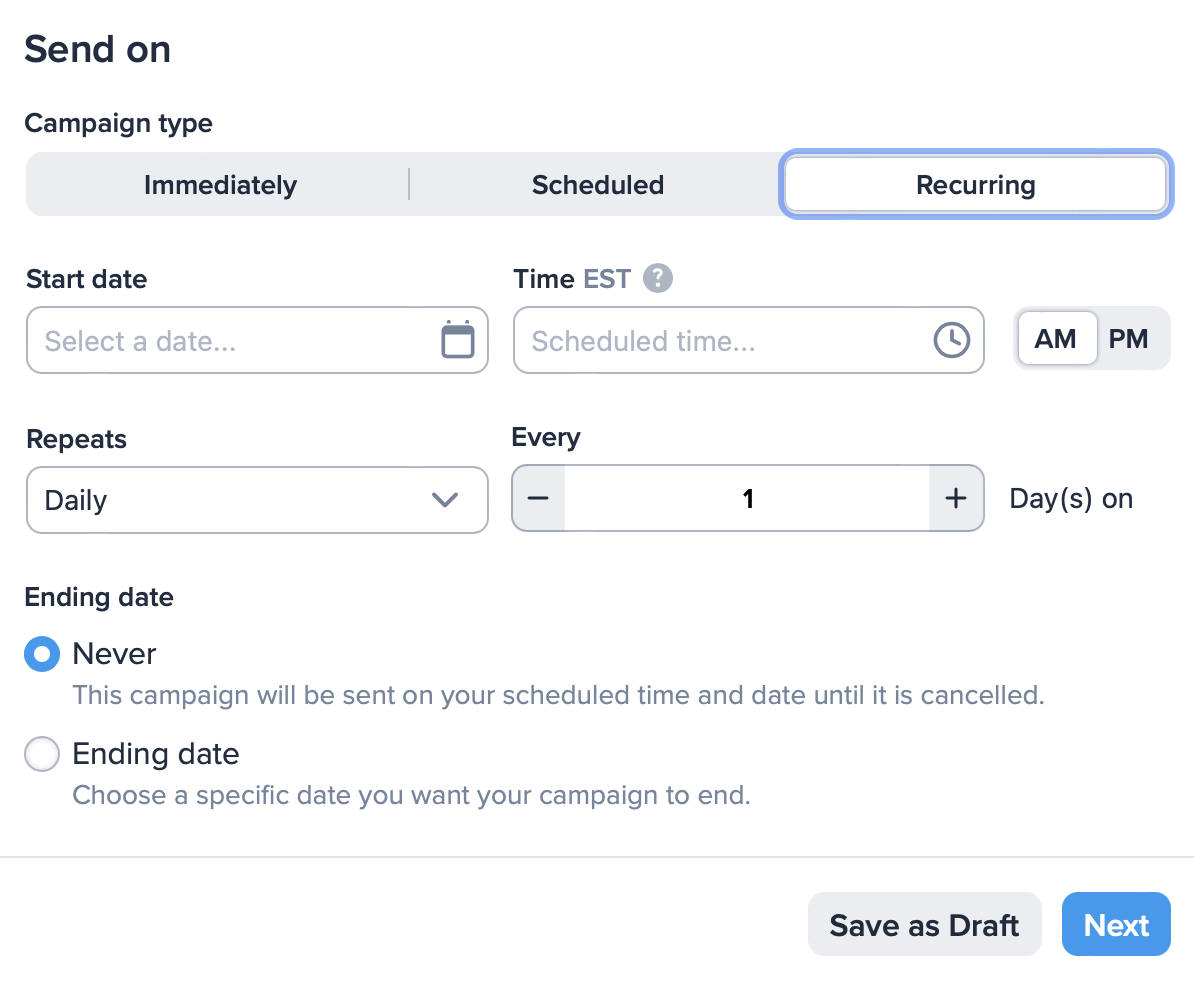
It’s almost go time. Your contact list is built and your campaign is designed and approved. All that’s left is to decide when to send it. SimpleTexting offers several options.
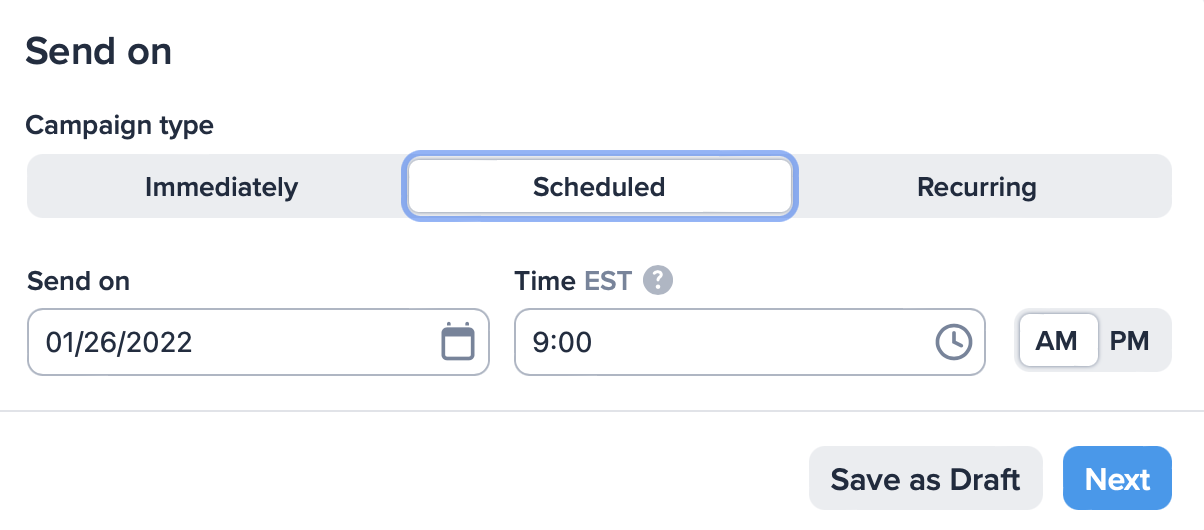
Scroll down the Compose campaign screen to the Send on section. Here you can choose when to send your text message. Your options are:
- Immediately – your campaign will go out as soon as you confirm it.
- Scheduled – your campaign will go out at a future date you select.
- Recurring – your campaign will go out multiple times on dates you select.
Whichever delivery option you choose, when you select Next you’ll be prompted with a final confirmation screen. This is where you can double-check and edit details of your campaign before you finalize it for delivery.
Once you are sure your campaign is as you want it, click Send now (for immediate delivery) or Schedule (for scheduled or recurring delivery). In this example, we chose immediate delivery. If you choose a future date or recurring delivery, you would see a Schedule button instead.

Congratulations, you’ve just created your first campaign and sent or scheduled your first group text using a business text messaging service.
Final Thoughts About Texting from a Laptop
With a business text messaging service, your laptop becomes a powerful tool to reach new and existing customers in an efficient and highly effective way. With it, you can send a single text to a VIP client or a group text to a targeted list–without having to squint at a mobile screen or set up everything using only your thumbs.
Text messaging boasts a nearly 100% read rate, so in just a few clicks you can get your important information in front of the eyes that really matter–all from your keyboard. It’s easy with a business text messaging service.